When was the last time you took a close look at your motorcycle before going on a ride? Not a quick glance but a real in-depth look at your bike and gear are performing. If it has been a while, we got you covered with our comprehensive motorcycle safety inspection guideline.
General Check
First, check the bike for noticeable issues like a crack, loose part, or leak. Make sure to look closely for anything that clearly needs repair. If anything is broken, repair it before taking the bike for a ride or inspection.
Tire Check
After looking around the bike for any general issues, inspect the tires to confirm they have enough tread and tire pressure. Check the tires to ensure they are at the manufacturer’s recommended PSI. Place a penny in the tire groove to check the tread with Lincoln’s head pointing toward the tire. If you can see Lincoln’s hairline on the tire’s surface, it is time to replace the tires.
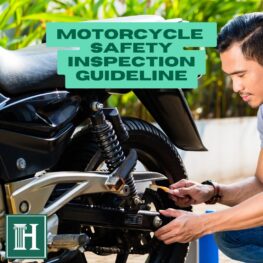
Brake Check
After checking the tires, move on to the brakes. While you can check by looking for grooves in the brake pads, it is best to test the front and rear brakes to guarantee they work properly.
Electrical System Check
So now you have done a quick overall inspection, checked the tires, and brakes. Next is the electrical system. Start with the battery and the terminals attached to it. Inspect the terminals for any corrosion. There are plenty of at-home or DIY solutions to wipe off corrosion, if there is any on the terminals. After checking the battery and terminals, turn the bike on to see if there are any warning lights and that everything else lights up correctly. During this time, check the headlights, taillights, turn signals, brake lights, and horns to ensure they work properly. After that, check the handlebars to ensure they have the full range of motion.
Fluid Check
After the electrical system, check the bike’s fluids. This inspection means checking the engine oil, fork oil, brake fluid, and transmission fluid. Refill or replace any fluids that need it. After reviewing the fluids, check the hoses to verify everything is connected and there are no leaks or cracks.
Gear Check
Finally, make sure the gear protecting you is perfect. Check your helmet and confirm there are no cracks, and you can easily see through the visor. If there are any cracks, you should replace the helmet no matter how inconsequential the crack seems, as it can sabotage the helmet’s usefulness if ever needed. After the helmet, check your clothes, gloves, and shoes to be comfortable and have a full range of motion.
Going on a road trip? Check out our “Motorcycle Road Trip Pack List” blog to make sure you do not forget anything!
The post MOTORCYCLE SAFETY INSPECTION GUIDELINE appeared first on .
from Herrman & Herrman, P.L.L.C. https://www.herrmanandherrman.com/blog/motorcycle-safety-inspection-guideline/
via https://www.herrmanandherrman.com
No comments:
Post a Comment